Google+

July 16, 2015

Seared Salmon with Corn Relish

One of the many perks of living in Madison for the summer is the farmers' market, which I personally think is the best in the country. The corn is especially delicious, with Wisconsin being in the Midwest and all, and lately the tomatoes have been looking pretty good too. I was also lucky enough to find Vidalia onions all the way from Georgia in my local grocery store, and the absolute best way to combine all this fresh produce is by making a relish, which just so happens to go perfectly with salmon to create a healthy and flavorful weeknight dinner.


I tried to keep the salmon itself fairly simple to let the relish stand out. It marinates in a mixture of olive oil, garlic, and rosemary just while you start on the relish, and it gets a final sprinkle of flaky sea salt and cracked black pepper before being seared in a hot skillet. I prefer thicker pieces of salmon, so I've found that it needs a few minutes in the oven to finish cooking. If you have a thinner piece or don't mind the skin getting a little *too* crispy (read: burnt) you can cook it fully in the skillet.


Honestly, the best part of this dish is the relish. I can eat this stuff with a spoon, especially if I throw in some crispy chopped up bacon (always a welcome addition). I start by tossing some cherry tomatoes in olive oil, sea salt, and black pepper and roasting them in a hot oven until they burst. I generally leave the oven on but at a lower temperature in case I need to finish the salmon. Meanwhile, I caramelize the onions. Actually, I usually do this first since it can take a reeeeeally long time to get them done properly, but slicing them as thin as possible definitely speeds up the process.


Lastly, I simmer the corn until sweet and tender and remove the kernels from the cob. The corn kernels, caramelized onions, and tomatoes are tossed together (you can also throw in any leftover fresh herbs you have on hand) and spooned over the flaky, juicy seared salmon. I've been eating this practically every other day this summer, so I'm pretty sure I'm singlehandedly supporting the Wisconsin fish importing industry.


1 1/2 lbs Salmon
1/3 Cup Olive Oil
4 Cloves Garlic, Minced
2 Sprigs Rosemary
4 Ears Corn
1 Pint Cherry Tomatoes
2 Sweet Onions, Sliced Thinly
2 tsp Brown Sugar
1 T + 1/4 tsp Baking Soda

Heat some oil in a large skillet and add the onions. Cook over low heat until tender and almost caramelized, about 30 minutes. Stir in the brown sugar and 1/4 tsp baking soda, season with salt and pepper, and continue cooking until fully caramelized, about 10-15 minutes more.

Combine the olive oil, garlic, rosemary, and some sea salt and pepper and brush onto the salmon.

Heat oven to 400F and line a baking tray with parchment.

Toss the tomatoes in some olive oil and season with salt and pepper. Spread onto the prepared tray and roast in the oven for 10 minutes or until just burst. Lower the heat to 375F and place a new sheet of parchment on the baking sheet.

Meanwhile, bring a large pot of salted water to a boil. Add the remaining baking soda and the corn. Turn off the heat, cover, and let sit for 10 minutes, turning occasionally. Drain the corn and remove the kernels when cool.

Heat another large skillet and sear the salmon until brown. Transfer to the prepared tray and roast in the oven for 6-8 minutes or until cooked through.

Stir the corn kernels and roasted tomatoes into the skillet with the onions. Cook over low heat for 4 minutes or until hot, then serve over the salmon.

Serves 6
Recipe Adapted from How Sweet Eats

July 4, 2015

Skillet Cookies

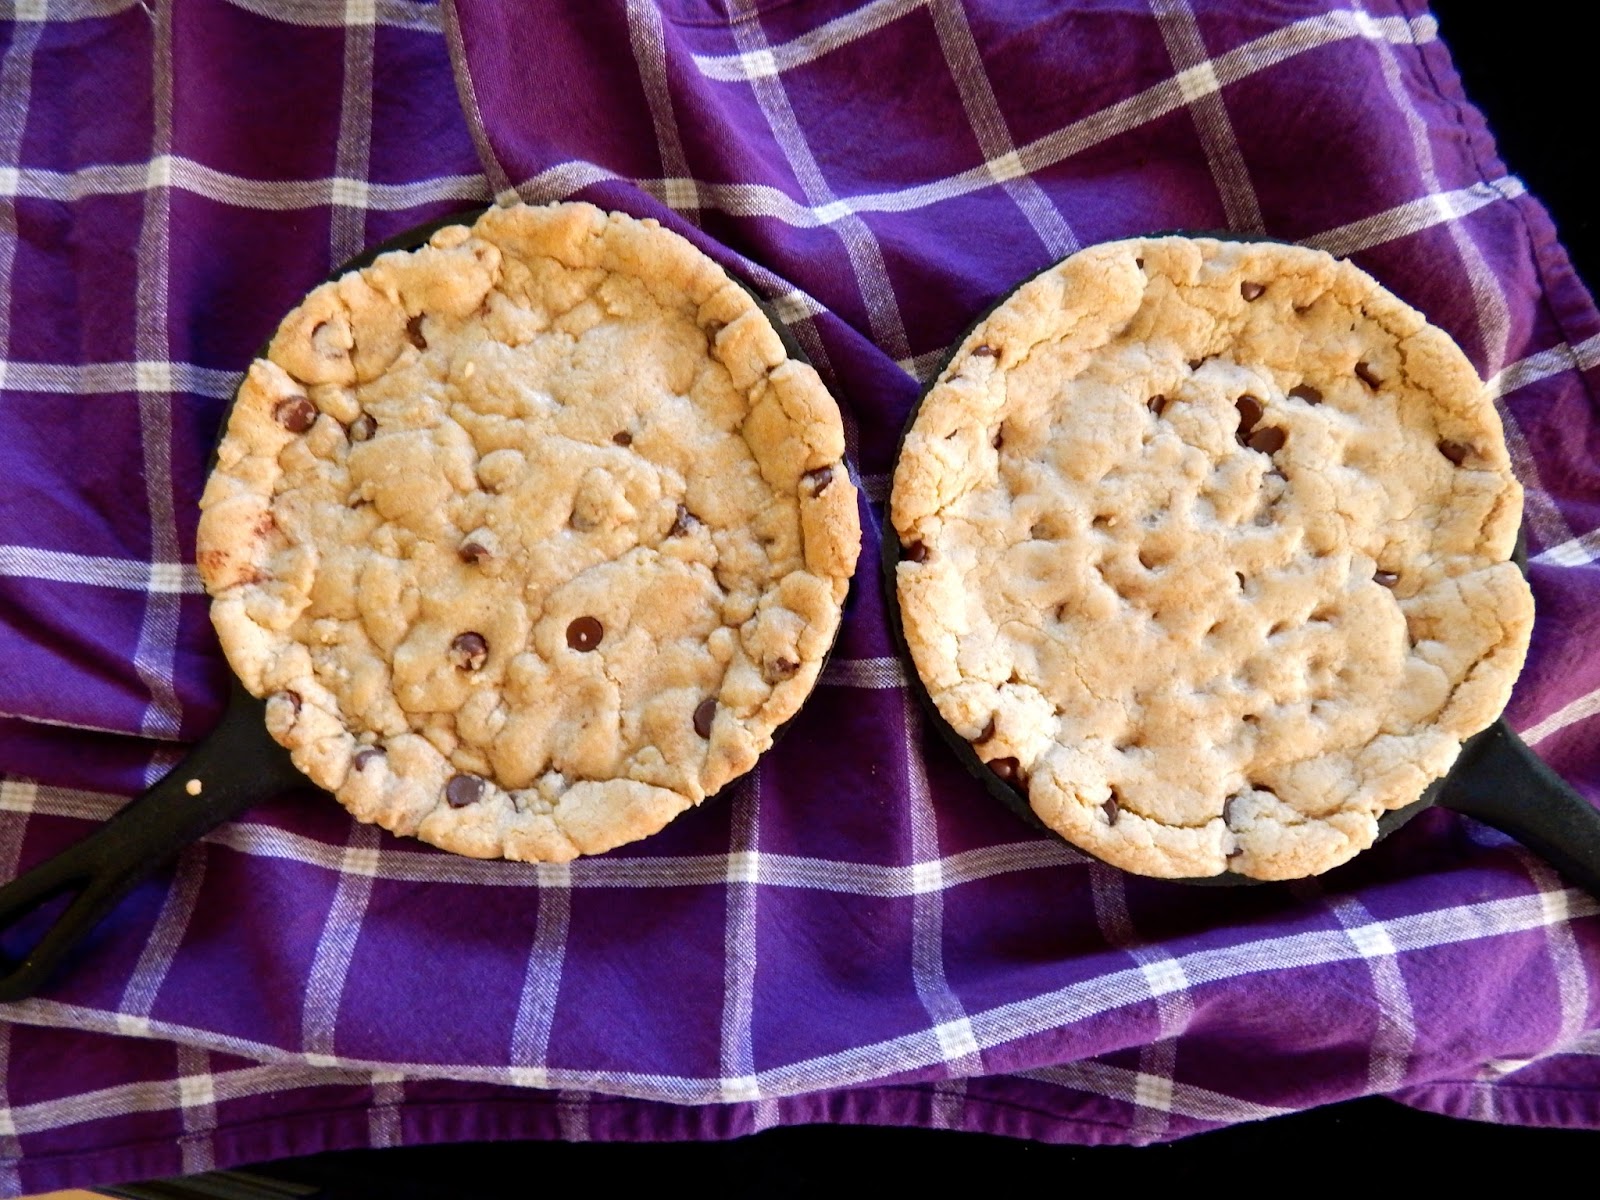
It was my birthday earlier this week, and sadly (or not?) I was too busy to post one of my favorite recipes of all time: skillet cookies. My quest to bake the perfect skillet cookie started at an Atlanta steakhouse called Bricktops. Every time my family went there I would insist on ordering this giant, gooey chocolate chip cookie baked in a skillet and topped with vanilla ice cream and caramel sauce regardless of how full I was from my steak and whipped potatoes. Eventually I realized that if I could make skillet cookies at home I could eat them even when I wasn't already stuffed and could therefore manage to eat more of these addicting desserts.


I suppose I could have just pressed my go-to chocolate chip cookie recipe into a skillet and baked it halfway, but that just wasn't right. It's still a pretty similar recipe and is definitely just as easy as making regular cookie dough. In fact, this is probably even easier because there's no scooping involved; you just press the dough into the skillet and bake.


The recipe starts by melting the butter--the first deviation from my regular recipe. Melting the butter makes the cookie denser and less cakey. That doesn't sound particularly appetizing until you consider the fact that you're basically eating half-baked cookie dough, which doesn't need to be fluffy or cakey. That melted butter is whisked with granulated sugar and a little extra brown sugar. The extra brown sugar makes it a little sweeter (you're making a giant skillet full of molten cookie dough... go decadent or go home), moister, and adds a hint of caramel flavor. After the sugars come the eggs: one egg and one yolk to be precise. The extra yolk keeps the cookies soft and tender, and I use the same ratio for my regular chocolate chip cookies.


I also add some salt and vanilla; I add a fair amount of both because the salt enhances the other flavors and I'm pretty sure I'm addicted to vanilla. The dry ingredients are next. It's your standard mix of flour and baking soda, nothing fancy. Lastly, I stir in a ton of chocolate chips. Cutting chunks from a baking bar is always a good plan since I love how rustic the different sizes are; no bite is the same. If I don't have a baking bar on hand, I use a mix of regular chips and mini chips so I still get some variety. Of course, any chocolate is good chocolate (except unsweetened), so whatever you have will work just fine.


The biggest secret to this recipe isn't what's in the cookie; it's how you bake it. I happen to have two small skillets that are the perfect size for this. You can make this in one big skillet for an extra-gooey treat or just in a pie plate or cake pan if you don't have a skillet. The baking time is entirely up to you depending on how gooey you want this. I know a few people who just like the idea of a giant cookie, so they prefer to bake it until it's cooked through. I, however, am on Team Cookie Dough (TM?) and refuse to cook this any longer than half-baked. The timing does depend on the size and material of your baking vessel, so just keep an eye on it and take it out when it looks done to you. As soon as it comes out of the oven, top it with some ice cream and douse it in caramel and/or hot fudge and you've got the perfect dessert for any occasion.


1 1/2 Sticks Butter, Melted
1/2 Cup Sugar
1 Cup Light Brown Sugar
1 Egg
1 Egg Yolk
2 1/2 Cups Flour
3/4 tsp Baking Soda
3/4 tsp Salt
2 tsp Vanilla
1 1/4 Cups Chocolate Chips

Heat oven to 350F. Grease your skillet or mini skillets.

Stir the butter, sugar, and brown sugar together. Whisk in the egg, egg yolk, and vanilla. Fold in the flour, baking soda, and salt, then stir in the chocolate chips.

Divide the dough between the skillets and smooth. Bake for 12 minutes or until golden and jiggly.

Makes 4 6" Skillets or 1 Large Skillet
Adapted from Cookies and Cups

June 30, 2015

Caramel Apple Hand Pies

Although I usually post red white and blue recipes for the 4th of July, today I decided to go with the most American thing I could think of: apple pie. Well, my picnic/barbecue/party-friendly version of it. I also added caramel, since frankly it's delicious and there's nothing more American than adding sugar to stuff. It just seemed appropriate.


Perhaps the most obvious deviation from your traditional apple pie is that these are hand pies, meaning they are perfect for crust lovers. You can easily make these larger, though I wouldn't go much bigger than the size of a pop tart. I happened to have scalloped cookie cutters, so that's the shape I went with. Just make or buy a basic pie crust dough, roll it out as thin as you can without it breaking, and cut into twice as many pieces as you want pies. I've found that I need to make enough pie for a double crust to handle all the apples. Usually the refrigerated pie crusts come in packs of two, which should be enough as well.


The filling is like a traditional apple pie filling except the apples are cut much smaller. You don't want to have just one apple chunk in your pie, and you also want the apples to cook through, which is why I cut mine about the size of peas. If you decide to make larger pies, you can cut the apples a little larger. I toss the diced apples with some cinnamon, sugar, cornstarch, and lemon juice (for taste, sweetness, non-liquidy-ness, and tartness) as well as some of the caramel.


To make this recipe a little easier, I decided to go with my mock caramel sauce. Honestly, I've been having some difficulties making real caramel (I know, I'm supposed to be researching the stuff but it just isn't working). This sauce involves boiling cream, brown sugar, and butter together until thick instead of burning sugar and then adding cream. Since caramel isn't the main thing going on in this recipe, I don't feel too bad about taking a shortcut. Besides, that means these pies are ready just a little bit sooner, which means they are ready for snacking and 4th of July festivities!


1 Recipe Double Crust Pie Crust Dough
1 Granny Smith Apple
1 tsp Lemon Juice
1/4 tsp Cinnamon
2 T Sugar
1/2 Cup Dark Brown Sugar
1 T Flour
1 T Cornstarch
1 Egg
1/2 Cup + 1 T Cream
2 T Butter
1/4 tsp Vanilla


Whisk 1/2 cup cream, dark brown sugar, and butter together in a small pot. Bring to a boil and simmer for 10 minutes or until thickened. Whisk in a pinch of salt and the vanilla. Set aside to cool.

Roll the pie dough out to 1/4" thick and cut into 2 1/2" rounds. Chill until firm.

Peel, core, and dice the apples into small cubes about the size of peas. Whisk the lemon juice, cinnamon, sugar, flour, cornstarch, a pinch of salt, and 2 T of the caramel sauce. Gently stir in the apples.

Whisk the egg and the  remaining cream together.

Scoop a spoonful of the apple filling onto the center of half the pie crust rounds, leaving a small border around the edges. Drizzle with some of the caramel sauce. Roll out the remaining rounds so they are slightly larger, then brush the edges with a bit of egg wash. Press onto the rounds with the apples to adhere, then brush the tops with more egg wash. Cut a small slit or hole on the tops and refrigerate until cold, about 20 minutes.

Heat oven to 375F and line cookie trays with parchment.

Transfer the pies to the prepared trays and bake until golden, about 12 minutes.

Makes 18
Recipe Adapted from Just a Taste